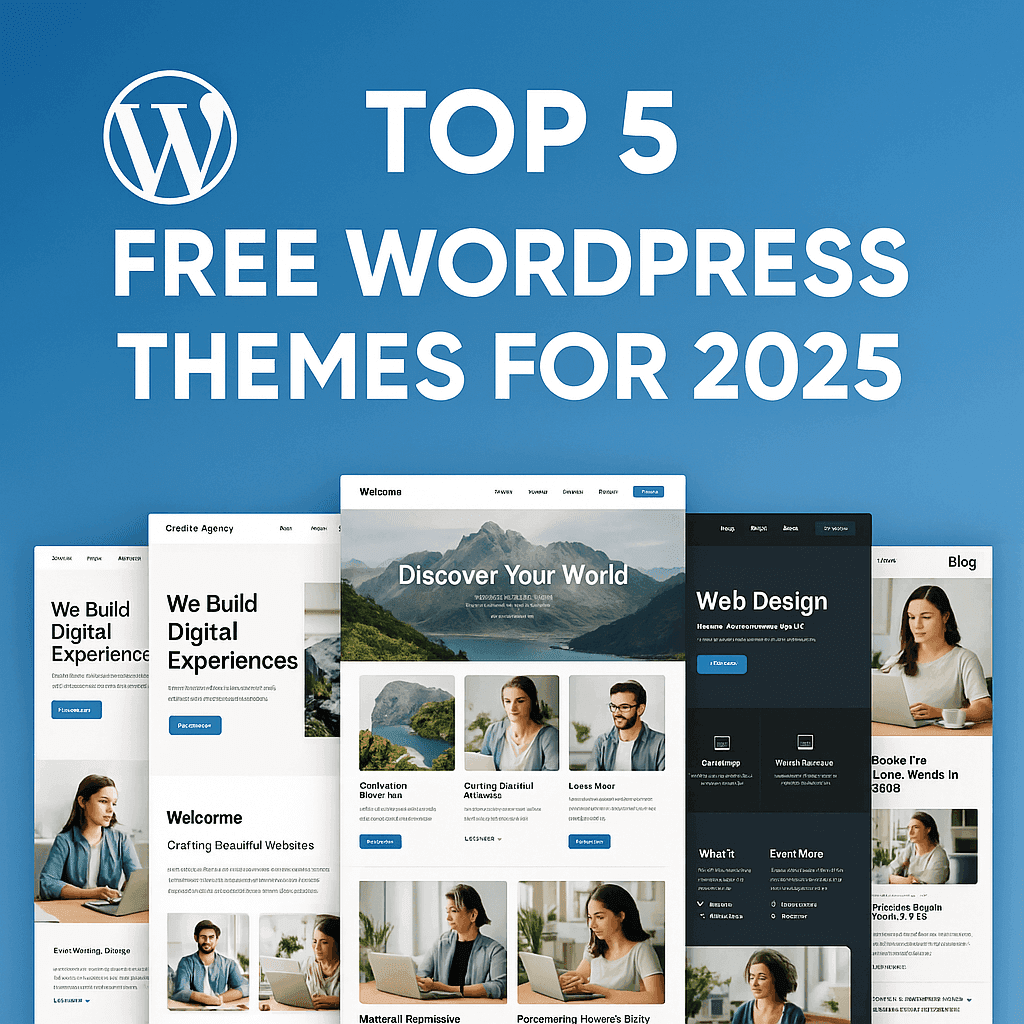
Building a website can be expensive, but WordPress makes it significantly easier by offering powerful free WordPress themes that deliver professional results without breaking the bank. While premium themes have their advantages, many free alternatives provide excellent functionality and design flexibility. Therefore, whether you’re launching a blog, portfolio, business site, or personal project, choosing the right free WordPress theme is absolutely crucial for your online success.
However, with thousands of themes available, selecting the best one can be overwhelming. That’s why we’ve carefully evaluated the top options to save you time and effort. In addition to being cost-effective, these themes offer responsive designs, customization options, and strong performance—features that were once only available in premium products.
In this post, we’ll explore the top 5 free WordPress themes for 2025, including the increasingly popular Blocksy theme. Furthermore, we’ll highlight what makes each theme unique so you can make an informed decision. As a result, you’ll be able to launch a stunning website that looks professional while staying within your budget.
Ultimately, by leveraging these free themes, you can allocate more resources to other important aspects of your website, such as content creation or marketing. So let’s dive in and discover which free WordPress themes can help you build the perfect site in 2025!
1. Blocksy – The Best All-Round Free Theme
Blocksy is one of the most powerful free WordPress themes available. It’s designed to be lightweight, fast, and customizable, making it a great choice for blogs, portfolios, business sites, and even small online stores.
Whether you’re building a business agency, online store, corporate site, educational platform, restaurant page, blog, portfolio, or landing page, Blocksy provides the flexibility you need. It integrates flawlessly with popular page builders like Elementor, Beaver Builder, Visual Composer, and Brizy, giving you total design freedom.

Key Features of Blocksy:
- Ultra-fast performance – Built with modern technology for fast loading times. Blazing fast and lightweight, optimized for speed and performance.
- Fully customizable – Offers a drag-and-drop header and footer builder. Fully responsive and adaptive design for all devices.
- Works with popular page builders like Elementor, Gutenberg, and Brizy.
- SEO-friendly – Designed to help your site rank better on Google.
- Compatible with top plugins – Works with major WordPress plugins like Contact Form 7 and Rank Math.
- Translation ready – supports multiple languages.
- Built-in WooCommerce integration – for creating online stores.
- Flexible customization options – includes typography, colors, and layouts.
Why Choose Blocksy? Blocksy is perfect for beginners and advanced users who want full control over their website design without needing to code. If you’re looking for a modern, feature-rich, and performance-focused theme, Blocksy is the way to go!
How to Install the Blocksy Theme – Step by Step
Installing the Blocksy theme in WordPress is simple. Follow these steps to set it up quickly:
Method 1: Installing Blocksy from the WordPress Theme Directory
- Log in to Your WordPress Dashboard
- Go to
yourwebsite.com/wp-adminand log in.
- Go to
- Go to the Themes Section
- In the left sidebar, navigate to Appearance > Themes and click on Add New.
- Search for Blocksy
- In the search bar, type Blocksy and wait for the theme to appear in the search results.
- Install the Theme
- Click the Install button on the Blocksy theme.
- Activate Blocksy
- Once installed, click Activate to make Blocksy your active theme.
Method 2: Installing Blocksy Manually (Uploading a .ZIP File)
If you downloaded the Blocksy theme from the official website, follow these steps:
- Download Blocksy
- Visit Blocksy’s official website and download the free version.
- The theme will be saved as a
.zipfile.
- Upload the Theme to WordPress
- In your WordPress dashboard, go to Appearance > Themes > Add New.
- Click Upload Theme, select the Blocksy .zip file, and click Install Now.
- Activate Blocksy
- After installation, click Activate to apply Blocksy to your site.
Method 3: Installing Blocksy Pro (For Premium Users)
If you purchased Blocksy Pro, follow these steps to install and activate its premium features:
- Purchase Blocksy Pro
- Go to Blocksy Official Website and buy the Pro version.
- Download the Blocksy Companion Pro plugin.
- Upload and Install Blocksy Pro Plugin
- In WordPress, go to Plugins > Add New and click Upload Plugin.
- Select the Blocksy Pro
.zipfile and click Install Now.
- Activate Blocksy Pro
- Click Activate after installation is complete.
- Enter Your License Key
- Go to Blocksy > Account, enter the license key you received via email, and click Activate License.
Next Steps After Installation
- Install Blocksy Companion Plugin – This free plugin unlocks additional features, including demo imports.
- Import a Starter Site – Use the Starter Sites feature to quickly set up a professional-looking website.
- Customize Your Website – Go to Appearance > Customize to adjust colors, layouts, typography, and more.
- Install Recommended Plugins – Add essential tools like Elementor, WooCommerce, or SEO plugins for extra functionality.
How to Set Up a Starter Template in Blocksy
Blocksy provides Starter Sites that allow you to quickly launch a professional website with pre-built designs. Follow these steps to import and customize a Starter Template:
Step 1: Install the Blocksy Companion Plugin
The Blocksy Companion Plugin unlocks additional features, including Starter Site imports.
- Go to Plugins > Add New in your WordPress dashboard.
- Search for Blocksy Companion and click Install Now.
- After installation, click Activate.
Step 2: Import a Starter Site
- Go to Blocksy > Starter Sites in the WordPress dashboard.
- Browse the available Starter Sites and select one that fits your website’s purpose.
- Click Preview to see how it looks, then click Import Site.
- Choose the preferred page builder (Elementor, Brizy, or Gutenberg) for customization.
- Enable additional plugins if required (such as WooCommerce for online stores).
- Click Start Import and wait for the process to complete.
Step 3: Customize Your Site
After importing a Starter Site, you can customize it to match your brand.
- Go to Appearance > Customize to access the WordPress Customizer.
- Adjust the logo, typography, colors, and layout settings to fit your style.
- Modify the header and footer using Blocksy’s advanced customization options.
- Edit individual pages using your selected page builder (Elementor, Brizy, or Gutenberg).
- Save changes and preview your website before making it live.
Step 4: Optimize for Performance and SEO
To ensure your site is fast and search engine-friendly, follow these tips:
- Enable Blocksy’s Performance Settings in Blocksy > General Settings
- Use a caching plugin like WP Rocket or W3 Total Cache for faster load times
- Optimize images using plugins like ShortPixel or Smush
- Install an SEO plugin such as Rank Math or Yoast SEO for better search rankings
Final Steps: Launch Your Website
- Test your site on mobile and desktop to ensure it looks good on all devices.
- Install security plugins like Wordfence or Sucuri for protection.
- Launch your site by sharing your domain and promoting it online.
User Ratings & Reviews
Blocksy has earned an average rating of 4.9/5 stars, with users praising its speed, flexibility, and ease of use, making it one of the most highly rated WordPress themes available.
2. Astra – Lightweight and Fast Theme
Astra is another popular free WordPress theme known for its speed, flexibility, and easy customization. It’s perfect for blogs, business websites, and portfolios.
Astra is a lightning-fast, highly customizable WordPress theme with over one million downloads and more than 5,700 five-star reviews, making it one of the most popular themes in the world. Designed for professional web designers, solopreneurs, small businesses, eCommerce stores, membership sites, and virtually any type of website, Astra offers an unmatched level of flexibility and performance.

Key Features of Astra:
- Super lightweight – Loads in less than 0.5 seconds.
- Pre-built website templates – Quick start with beautiful ready-made designs.
- No jQuery – Uses Vanilla JavaScript for improved performance.
- SEO-friendly – Helps websites rank higher on Google.
- Compatible with major plugins like Yoast SEO, WPForms, and Elementor.
- Optimized for Speed – Built with lightweight code to ensure fast loading times.
- Highly Customizable – Extensive options for colors, typography, layouts, and headers.
- SEO-Friendly – Includes schema markup and follows best SEO practices.
- Mobile-First Design – Fully responsive and optimized for all devices.
- Works with Popular Page Builders – Seamlessly integrates with Spectra, Elementor, Beaver Builder, and more.
- WooCommerce and SureCart Integration – Packed with store-friendly features and templates for online shops.
- Expert Support – A dedicated team of WordPress professionals assists even free users.
Why Choose Astra? Astra is great if you want a fast-loading, minimalistic theme with lots of customization options. It’s beginner-friendly and works well with all major page builders.
How to Install the Astra Theme – Step by Step
Installing the Astra theme on your WordPress website is quick and easy. Follow these steps to get started:
Method 1: Installing Astra from the WordPress Theme Directory
- Log in to WordPress
- Go to your WordPress Dashboard by entering
yourwebsite.com/wp-adminin your browser.
- Go to your WordPress Dashboard by entering
- Go to Themes
- In the left sidebar, navigate to Appearance > Themes and click on Add New.
- Search for Astra
- In the search bar, type Astra and wait for it to appear in the search results.
- Install Astra
- Click the Install button on the Astra theme.
- Activate the Theme
- Once installed, click Activate to apply Astra to your site.
Method 2: Manually Uploading the Astra Theme
If you downloaded the Astra theme from the official website, follow these steps:
- Download Astra
- Visit Astra’s official website and download the free version or purchase Astra Pro.
- You will get a
.zipfile of the theme.
- Upload the Theme to WordPress
- Go to Appearance > Themes > Add New in your WordPress dashboard.
- Click the Upload Theme button and select the
.zipfile you downloaded.
- Install and Activate
- Click Install Now and then Activate once the installation is complete.
Method 3: Installing Astra Pro (For Premium Users)
- Purchase Astra Pro
- Go to Astra’s Official Website and purchase the Pro version.
- Download the Astra Pro plugin (not a theme).
- Upload Astra Pro Plugin
- In WordPress, go to Plugins > Add New and click Upload Plugin.
- Select the Astra Pro
.zipfile and click Install Now.
- Activate the Plugin
- Once installed, click Activate to enable Astra Pro features.
- Enter License Key
- Go to Appearance > Astra Options and enter the license key provided in your Astra Pro purchase confirmation email.
Next Steps After Installation
- Import a Starter Template – Install the Starter Templates plugin to quickly set up a pre-designed website.
- Customize Your Site – Use WordPress Customizer to adjust colors, fonts, layouts, and more.
- Install Recommended Plugins – Add essential plugins like Elementor, WooCommerce, or Spectra for additional functionality.
How to Set Up a Starter Template in Astra
Astra provides Starter Templates that allow you to quickly build a professional website with pre-designed layouts. Follow these steps to import and customize a Starter Template in Astra:
Step 1: Install the Starter Templates Plugin
The Starter Templates Plugin is required to access Astra’s ready-made website designs.
- Go to Plugins > Add New in your WordPress dashboard.
- Search for Starter Templates and click Install Now.
- Click Activate after installation is complete.
Step 2: Import a Starter Template
- Go to Appearance > Starter Templates in the WordPress dashboard.
- Choose your preferred page builder (Elementor, Beaver Builder, Brizy, or Gutenberg).
- Browse through the available templates and select one that fits your website’s purpose.
- Click on the template to preview it, then click Import Complete Site (or Import Single Page if you only want specific pages).
- Astra will automatically install the required plugins and settings for the template.
- Once the import is complete, click View Site to see your new design.
Step 3: Customize Your Website
- Go to Appearance > Customize to access the WordPress Customizer.
- Modify the logo, colors, fonts, and layouts to fit your brand.
- Edit pages using your chosen page builder (Elementor, Brizy, Beaver Builder, or Gutenberg).
- Adjust the header and footer using Astra’s built-in Header/Footer Builder.
- Save your changes and preview the site before making it live.
How to Optimize Astra for Speed
Astra is already a lightweight and fast theme, but you can further optimize its performance with these steps:
1. Enable Astra Performance Features
- Go to Appearance > Customize > Performance and enable the following:
- Load Google Fonts Locally (reduces external requests)
- Enable Preload for Fonts (improves loading speed)
- Remove jQuery Dependency (only if your website does not rely on jQuery-based plugins)
2. Use a Caching Plugin
- Install a caching plugin like WP Rocket, W3 Total Cache, or LiteSpeed Cache to reduce load times.
- Configure caching settings to enable page caching, browser caching, and minification.
3. Optimize Images
- Use an image compression plugin like ShortPixel or Smush to reduce image file sizes without losing quality.
- Serve images in WebP format for faster loading.
4. Enable a Content Delivery Network (CDN)
- Use a CDN like Cloudflare or BunnyCDN to deliver content faster across different regions.
5. Minimize CSS and JavaScript
- Use Autoptimize or WP Rocket to combine and minify CSS and JavaScript files.
- Enable lazy loading to delay the loading of images and videos until they are needed.
User Ratings & Reviews
With an average rating of 4.9/5 stars, Astra is widely praised for its speed, flexibility, and ease of use, making it a top choice for WordPress users worldwide.
3. Neve – Best for Speed and Simplicity
Neve is a fast, lightweight, and mobile-friendly WordPress theme. It’s perfect for small businesses, freelancers, and bloggers who want a simple and clean design.
Neve is an advanced, ultra-fast WordPress theme built for exceptional performance, SEO, and Core Web Vitals. Its lightweight code and compact structure ensure minimal overhead and rapid loading speeds. Fully compatible with the block editor, popular page builders like Elementor, Bricks, Oxygen, and WooCommerce, Neve is an ideal choice for blogs, small businesses, agencies, portfolios, and online stores. With its responsive design, multilingual support, and easy customization options, Neve helps you build a high-performing, future-proof website that ranks well in search engines. Explore all the features Neve offers and discover the powerful capabilities of the premium version.

Key Features of Neve:
- Loads in under 1 second – Super optimized for speed.
- Fully responsive – Looks great on mobile devices.
- Ultra-Fast Performance – Lightweight code and optimized design for faster loading speeds and better performance.
- SEO Optimization – Built with SEO in mind to help your website rank higher in search engines.
- Core Web Vitals Support – Designed to meet and exceed Google’s Core Web Vitals standards.
- Compatibility with Page Builders – Fully compatible with popular page builders like Elementor, Bricks, Oxygen, and the WordPress block editor.
- WooCommerce Integration – Seamless integration for building and managing online stores.
- Responsive Design – Automatically adjusts to fit all screen sizes, ensuring a mobile-friendly experience.
- Multilingual Support – Easily create a multilingual website with translation-ready features.
- Easy Customization – Provides a user-friendly interface with options for layout, typography, and color customization.
- Starter Sites – Access professionally designed templates for easy website setup.
- Regular Updates and Support – Frequent theme updates and dedicated customer support for both free and premium users.
Why Choose Neve? If you’re looking for a no-fuss, fast, and stylish theme that is easy to set up, Neve is a fantastic choice!
How to Install the Neve Theme – Step by Step
Method 1: Install Neve Theme from WordPress Dashboard
- Log in to WordPress Admin
- Go to
yourdomain.com/wp-adminand log in.
- Go to
- Navigate to Themes
- In the left sidebar, go to Appearance > Themes.
- Click “Add New”
- Click the “Add New” button at the top.
- Search for Neve
- In the search bar, type “Neve” and press Enter.
- Install Neve Theme
- Hover over the Neve theme and click “Install”.
- Activate the Theme
- After installation, click “Activate”.
- (Optional) Install Recommended Plugins
- Neve may prompt you to install plugins like Starter Templates (for demo imports). Follow the prompts if needed.
Method 2: Upload Neve Theme Manually (ZIP File)
If you downloaded Neve from ThemeIsle or WordPress.org:
- Download the Neve ZIP File
- Get the latest version from:
- WordPress.org (Free)
- Or the Pro version from ThemeIsle.
- Get the latest version from:
- Go to WordPress Themes
- Navigate to Appearance > Themes > Add New.
- Upload the Theme
- Click “Upload Theme”, then “Choose File” and select the Neve ZIP file.
- Click “Install Now”.
- Activate the Theme
- After installation, click “Activate”.
Method 3: Install Neve via FTP
- Download & Extract Neve
- Download the Neve ZIP file and extract it to a folder.
- Connect via FTP
- Use an FTP client (like FileZilla) to connect to your site.
- Upload the Theme
- Navigate to
/wp-content/themes/and upload the extracted Neve folder.
- Navigate to
- Activate in WordPress
- Go to Appearance > Themes and activate Neve.
Next Steps After Installing the Neve Theme
1. Install Recommended Plugins (Optional)
- Neve may recommend plugins like Starter Templates (for demo imports) or Elementor/Beaver Builder (for page building).
- Go to Appearance > Install Plugins and follow the prompts.
2. Import a Starter Site (Optional)
- If you want a pre-designed layout:
- Go to Appearance > Neve Options > Starter Sites.
- Choose a demo and click Import.
3. Customize the Theme
- Go to Appearance > Customize to adjust:
- Layout (Header, Footer, Sidebar)
- Colors & Typography
- Homepage Settings (Static page or latest posts)
- Additional CSS (for advanced styling)
4. Set Up the Homepage
- If using a static homepage:
- Go to Settings > Reading.
- Select A static page and choose your homepage.
5. Configure Menus
- Go to Appearance > Menus:
- Create a new menu.
- Assign it to a location (e.g., Primary Menu, Footer).
6. Install Neve Pro (If Purchased)
- If you have the Neve Pro addon:
- Upload and activate the plugin via Plugins > Add New > Upload Plugin.
- Enter your license key (found in your ThemeIsle account).
7. Optimize Performance
- Enable caching (e.g., WP Super Cache or LiteSpeed Cache).
- Optimize images with Smush or ShortPixel.
8. Check Mobile Responsiveness
- Use the Customizer’s mobile view to ensure your site looks good on all devices.
9. Test & Launch
- Preview your site on different browsers (Chrome, Firefox, Safari).
- Check for broken links using Broken Link Checker.
Once everything is set up, your site is ready to go live.
User Ratings & Reviews
With an average rating of 4.7/5 stars, Neve is highly regarded for its performance, flexibility, and user-friendly design, making it a solid choice for both beginners and experienced WordPress users seeking a customizable and fast-loading theme.
4. Kadence – Best for Beginners
Kadence Theme is a lightweight yet feature-rich WordPress theme that makes it simple to create beautiful, fast-loading, and accessible websites. The theme includes an intuitive drag-and-drop header and footer builder, allowing you to design custom layouts in minutes. It also offers a full collection of professionally designed starter templates that can be easily customized using smart global font and color controls. With deep integration for popular third-party plugins, Kadence enables you to effortlessly build high-performing eCommerce stores, online courses, business websites, and more—all while maintaining optimal speed and usability. Perfect for both beginners and advanced users, Kadence combines flexibility with simplicity for a seamless website-building experience.
In summary, Kadence combines speed, flexibility, and ease of use—making it a top-tier WordPress theme for any website need.

Key Features of Kadence:
- Customizable layouts – Control site width, colors, fonts, and more.
- Drag-and-drop header and footer builder – No coding needed.
- Super fast and lightweight – Optimized for high-speed performance.
- Works with major plugins – Compatible with WooCommerce, Elementor, and more.
- SEO optimized – Designed to boost your Google rankings.
- Premium Starter Templates – Launch quickly with 50+ professionally designed demos.
- Global Style Controls – Manage colors, fonts, and spacing across your entire site.
- WooCommerce Optimized – Built-in enhancements for better online stores.
- Mega Menu Support – Create sophisticated navigation menus easily
- White Label Options – Perfect for agencies and developers.
Why Choose Kadence?
Kadence is great for beginners because of its intuitive interface and powerful customization options. It’s also perfect for businesses and creative professionals.Whether you’re a beginner or an experienced developer, Kadence provides the perfect balance of flexibility and simplicity to bring your website vision to life.
Additionally, Kadence offers unmatched customization flexibility. For instance, its intuitive drag-and-drop header and footer builder allows you to create professional layouts without touching a single line of code. Moreover, the theme includes a vast library of starter templates, making it easy to launch a polished website quickly. In contrast to themes with limited design options, Kadence provides extensive global styling controls for fonts, colors, and spacing.Another key advantage is its seamless plugin compatibility. Whether you’re building an eCommerce store with WooCommerce, an online course with LearnDash, or a membership site, Kadence integrates smoothly. Furthermore, the theme is designed with accessibility in mind, ensuring your site meets modern web standards.
How to Install Kadence Theme – Step by Step
Kadence is a lightweight, highly customizable WordPress theme perfect for business websites, blogs, and online stores. Follow these simple steps to install it.
Method 1: Install from WordPress Dashboard (Free Version)
- Log in to WordPress
- Go to
yoursite.com/wp-adminand enter your credentials.
- Go to
- Go to Themes Section
- Navigate to Appearance → Themes.
- Add New Theme
- Click “Add New” at the top.
- Search for Kadence
- Type “Kadence” in the search bar and press Enter.
- Install & Activate
- Click “Install”, then “Activate” once installed.
- (Optional) Install Kadence Starter Templates
- You’ll see a prompt to install the “Starter Templates” plugin for pre-built designs. Click “Install & Activate” if needed.
Method 2: Upload Kadence Pro (Premium Version)
- Download Kadence Pro
- Purchase from KadenceWP.com and download the
.zipfile.
- Purchase from KadenceWP.com and download the
- Go to WordPress Themes
- Navigate to Appearance → Themes → Add New → Upload Theme.
- Upload & Install
- Click “Choose File”, select the Kadence Pro
.zip, then click “Install Now”.
- Click “Choose File”, select the Kadence Pro
- Activate the Theme
- After installation, click “Activate”.
- Enter License Key
- Go to Kadence → License and enter your key for updates and support.
Next Steps After Installing Kadence Theme
1. Import a Starter Template (Recommended)
- Navigate to Appearance > Kadence > Starter Templates
- Browse and select a pre-designed template that fits your needs
- Follow the prompts to import demo content
2. Configure Global Site Settings
- Go to Appearance > Customize to adjust:
- Site Identity (logo, title, tagline)
- Colors & Typography (set global styles)
- Layout Settings (container width, sidebar options)
3. Customize Header and Footer
- Access the drag-and-drop builder via Appearance > Header or Footer
- Add/remove elements like logos, menus, buttons, and widgets
- Configure mobile-responsive settings
4. Set Up Essential Pages
- Create or assign:
- Homepage (Settings > Reading)
- Contact page
- Blog page (if needed)
- Legal pages (Privacy Policy, Terms)
5. Install Recommended Plugins
- Consider adding:
- Kadence Blocks for enhanced Gutenberg editing
- Kadence Conversions for popups and announcements
- WooCommerce (for online stores)
6. Optimize Performance
- Enable caching (via plugin like WP Rocket)
- Compress images (using Smush or ShortPixel)
- Review speed with tools like Google PageSpeed Insights
7. Configure Additional Features
- Set up mega menus if needed
- Adjust blog post layouts and archive pages
- Implement custom hooks (for developers)
8. Activate Premium Features (If Using Pro)
- Verify license key in Kadence > License
- Enable advanced modules like:
- Custom fonts
- Conditional headers
- Dynamic content
9. Test and Launch
- Preview on different devices
- Check for broken links
- Test forms and functionality
For detailed documentation, visit the Kadence Knowledge Base.
User Ratings & Reviews
With an average rating of 4.9/5 stars, Kadence maintains consistently high ratings across platforms, reflecting user satisfaction with its performance and features.
5. GeneratePress – Best for Performance
GeneratePress is one of the most optimized WordPress themes, making it an excellent choice for those who want speed and performance.
The Lightweight WordPress Theme Built for Speed and Performance
Designed with efficiency in mind, GeneratePress is a streamlined WordPress theme that delivers exceptional speed without sacrificing functionality. With a remarkably lean footprint, a fresh install adds less than 10KB (gzipped) to your page size, ensuring fast load times right from the start.
This theme fully embraces the modern WordPress experience, offering deep integration with the block editor (Gutenberg) for seamless content creation. For those who prefer visual builders, GeneratePress maintains full compatibility with popular page builders like Elementor and Beaver Builder, making it a versatile choice for any workflow.
Built to the highest standards, GeneratePress guarantees smooth operation with well-coded plugins, including WooCommerce for eCommerce sites. The theme is fully responsive, uses valid HTML/CSS, and has been translated into 25+ languages by its dedicated user community.

Key Features of GeneratePress:
- Lightweight (less than 30KB) – Super fast with minimal bloat.
- Fully responsive – Works on all devices.
- Highly customizable – Change colors, layouts, and typography easily.
- SEO-friendly – Optimized for search engines.
- Works well with major plugins – Elementor, Beaver Builder, and more.
- 60+ color controls for complete design flexibility
- Dynamic typography for precise text styling
- 5 navigation locations and 5 sidebar layouts
- Dropdown menus (click or hover)
- 9 widget areas for enhanced customization
Whether you’re building a simple blog or a complex business site, GeneratePress provides the speed, compatibility, and customization needed for a professional online presence.
Why Choose GeneratePress? If you’re looking for a super lightweight, high-performance theme, GeneratePress is the best option. It’s ideal for blogs, business websites, and freelancers who want a simple, powerful site.
How to Install GeneratePress Theme – Step by Step
Method 1: Install from WordPress Dashboard (Free Version)
- Log in to WordPress Admin
- Access your site by visiting:
yoursite.com/wp-admin
- Access your site by visiting:
- Navigate to Themes Section
- Go to Appearance → Themes in the left sidebar
- Add New Theme
- Click the “Add New” button at the top of the page
- Search for GeneratePress
- Type “GeneratePress” in the search field and press Enter
- Install and Activate
- Click “Install”, then select “Activate” once installation completes
- Install GeneratePress Premium (Optional)
- If using Premium, go to Plugins → Add New → Upload Plugin
- Upload the GeneratePress Premium plugin ZIP file
- Activate and enter your license key
Comparison: Best Free WordPress Themes (2025)
- Speed:
- • Blocksy: ⚡⚡⚡⚡⚡ (Fastest)
- • Astra: ⚡⚡⚡⚡⚡
- • GeneratePress: ⚡⚡⚡⚡⚡
- • Neve: ⚡⚡⚡⚡
- • Kadence: ⚡⚡⚡⚡
- Customization Options:
- • Blocksy: ★★★★★
- • Astra: ★★★★★
- • GeneratePress: ★★★★☆
- • Neve: ★★★★☆
- • Kadence: ★★★★★
- Mobile Friendliness:
- • Blocksy: 100/100
- • Astra: 100/100
- • GeneratePress: 100/100
- • Neve: 98/100
- • Kadence: 99/100
- Pre-Made Templates:
- • Blocksy: 10+
- • Astra: 100+
- • GeneratePress: 5+
- • Neve: 30+
- • Kadence: 15+
- Best For:
- • Blocksy → Blogs
- • Astra → Businesses
- • GeneratePress → SEO Sites
- • Neve → Portfolios
- • Kadence → Designers
- Special Strengths:
- • Blocksy: Best live customization
- • Astra: Most template choices
- • GeneratePress: Lightest code
- • Neve: Easiest starter sites
- • Kadence: Best design controls
- Limitations:
- • Blocksy: Fewer templates than Astra
- • Astra: Some features need Pro
- • GeneratePress: Fewer design options
- • Neve: Basic header/footer controls
- • Kadence: Premium templates locked
Frequently Asked Questions (FAQs)
1. What is the best free WordPress theme for speed?
Astra, Neve, and GeneratePress are among the fastest free themes available.
2. Can I use these themes for business websites?
Yes! All the themes listed are great for business websites, blogs, and personal projects.
3. Are free WordPress themes SEO-friendly?
Yes! Most modern free themes are built with SEO-friendly structures.
4. Can I use these themes without coding knowledge?
Absolutely! These themes are designed for beginners and require no coding experience.
5. Can I upgrade these themes to a premium version?
Yes! Most themes offer premium versions with extra features, but the free versions are great too!
Stay Safe Online: Secure Your Digital World! Get NordVPN or NordPass
Complete Review: Here
Conclusion
Choosing the right WordPress theme is essential for building a fast, professional, and SEO-friendly website. Whether you pick Blocksy, Astra, Neve, Kadence, or GeneratePress, you’ll get a high-quality, free theme that works great with plugins and is easy to customize.
Which Theme Should You Choose?
- Need speed? → GeneratePress (28KB!)
- Want templates? → Astra (100+ options)
- Prioritize design? → Kadence
- Building a blog? → Blocksy
- Local business site? → Neve
All five are 100% free, so test 2-3 before deciding!
Thank you so much for stopping by our blog and reading our guide! We poured our hearts into creating this resource to make your WordPress journey easier, and we’re thrilled if it helped you.
If you found this post useful:
Bookmark it for later!
Share it with a friend who’s building a website.
Leave a comment—we’d love to hear what theme you picked!
Click here for Free Website Builders!
Thank You for Reading our Review!
We truly appreciate you taking the time to read our guide on the Best 5 Free WordPress Themes for 2025. We hope this post helps/helped you find the perfect theme for your website!
If you want to share your experience with these themes, feel free to drop a comment below. Your feedback helps us create even better content for you.
Happy website building! Warmest regards,


Please keep comments helpful and respectful.
No affiliate links, promotional links, or YouTube URLs.
Let’s keep our community clean and supportive! 💙